

Overview
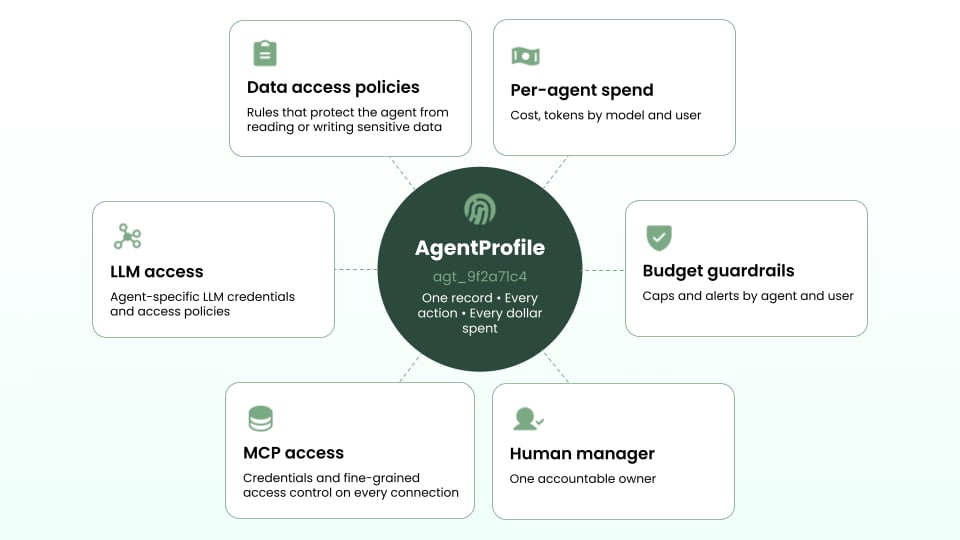
This binds together the LLM Gateway and MCP Gateway product modules. AgentProfile is the central object for both governed tool traffic and LLM usage especially useful for custom agents.
Configuring an Autonomous Agent with AgentProfile
To configure your autonomous agent:- Select and open the agent from the AI Agents list. https://app.barndoor.ai/agents
- Select the Edit action to open the agent configuration modal
- If the agent is to contain its own credentials to your MCP servers, enable the MCP Connections feature
- If the agent is to contain its own LLM keys, enable the LLM Gateway Enabled feature
Deciding which tool calls need a human
Whether an agent’s write actions pause for approval is set per tool and per group in the policy that governs the agent, not on the agent itself. For an unattended agent that must run without a human in the loop, set its tools to Always Allow; where you want a person to confirm, use Needs Approval. Test thoroughly before letting an agent make system updates unattended. See Granular Tool Use Confirmations for how to set the three states, and how overlapping group grants resolve.Enabling MCP Server Connections on an agent
Agents may be given its own service account credentials to the MCP Servers it needs access to. This is most valuable when creating custom agents that do not work explicitly on behalf of a user’s own login credentials. On the Edit AI Agent modal, the MCP Connections Enabled toggle controls whether this feature is enabled for the agent.- Default: off for new agents.
- When enabled: the agent can be given access credentials for each MCP server available in Barndoor.
- When disabled: the agent must utilize MCP user login credentials found otherwise in your agent application or through the user connection flows in Barndoor My Apps.
Enabling LLM Gateway on an agent
Most agents will interact with an AI model via the LLM gateway. If you are managing agentic access to models with Barndoor’s LLM gateway, this process will bind a virtual key to the agent so you can manage what models it may access and track its token spend. On the Edit AI Agent modal, the LLM Gateway Enabled toggle controls whether this feature is enabled for the agent.- Default: off for new agents.
- When enabled: the agent can be bound to LLM Gateway keys, and Barndoor starts routing and tracking its model calls.
- When disabled after keys are bound: a confirmation dialog warns you that bindings will be preserved but disabled. Turning the toggle back on automatically reactivates them.
Managing key bindings
Once LLM Gateway is enabled, a Manage keys action appears on the agent detail page kebab menu (⋮). It opens a dedicated screen listing keys you’re authorized to bind or you may provision a new key. An agent may have more than one model key, but each key may only be bound to a single agent.