- Admin privileges in your Barndoor organization.
- Application details for your agent, including application type (guidance below) and OAuth callback URL(s)
Step-by-step guide
- Go to AI Agents: https://app.barndoor.ai/agents.
- Click Add Agent button (top-right).
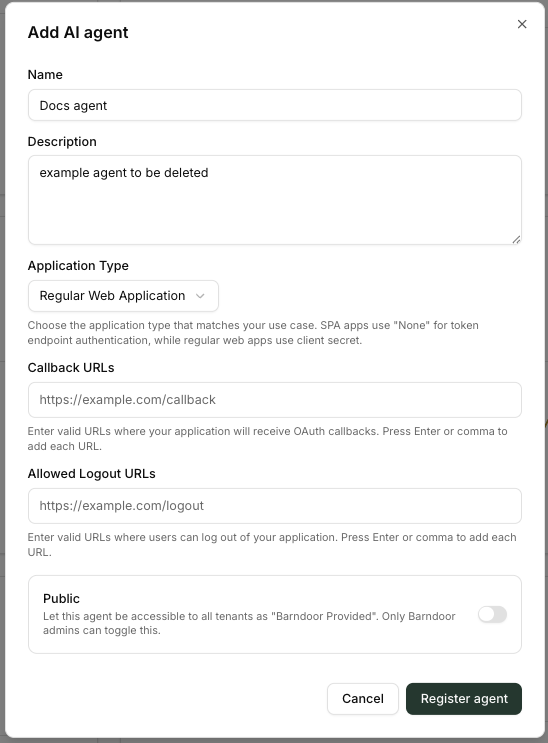
This opens the Add AI agent registration form.
Tip: If you don’t see the button, ensure your user has admin access.
Fill out the registration form
- Name
Clear, human-readable name (e.g.,Snowflake Assistant,Sales Ops Agent). - Description
Short sentence on what the agent does and which services it connects to. - Application Type
Choose one that matches how your agent will run:- Regular Web Application – Server-rendered web apps that keep secrets on the server.
- Single Page Application (SPA) – Front-end only apps; tokens handled in the browser.
- Native Application – Desktop or mobile apps running on user devices.
- Machine to Machine – Autonomous agent, backend services or daemons without user interaction.
- Callback URLs*
- Callback URLs* Enter one or more URLs where Barndoor should send callbacks after users sign in through your Identity Provider or authorize Barndoor to access an MCP server.
- Allowed Logout URLs
One or more URLs where users can be safely redirected after logging out (press Enter after each URL).
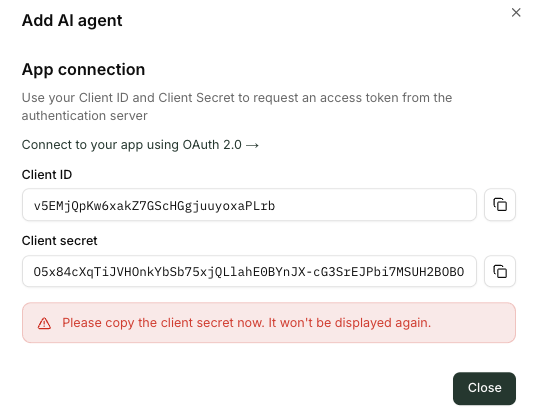
Your Agent Credentials
What happens next?
- Your new agent appears in the All Agents list.
- From there you can:
- Configure access policies for the agent by adding the agent to the scope of MCP servers such as Snowflake, Salesforce, and Notion in Access Control Center.
- For Machine to Machine or Autonomous Agents, you can directly connect them to MCPs with service account credentials.
- Manage auth settings and rotate credentials if your application type requires it.
- Monitor Active users and Monitored actions over time.
Machine to Machine Agent Configuration
Agents configured with the “Machine to Machine” agent type can connect directly to MCPs without requiring per-user authorization. Instead, they use service accounts registered in the underlying systems of the MCPs you want your autonomous agent to access. To configure a Machine to Machine agent:- Select the agent from the All Agents list.
- (Recommended) Turn off ToolIQ Write Confirmations so the agent can operate without a human in the loop. Be sure to test thoroughly before allowing it to make system updates.
- Click Manage Connections.
- Click Connect for each MCP the agent needs access to.
- When prompted, authenticate to the underlying system using the appropriate service account credentials.
Troubleshooting
- “Register agent” is disabled
Ensure Name, Application Type, and at least one Allowed Logout URL are provided. - Not sure which application type to pick?
Use Regular Web Application for server-based apps, SPA for purely browser apps, Native for desktop/mobile clients, and Machine to Machine for backend jobs with no user login. - Can’t access Agents page
Ask an org admin to grant you the necessary permissions or create the agent on your behalf.
Next steps: After creating the agent, head to Connected Services to connect MCP servers your agent will use.